Use the Flex AI API in OpenWrite
OpenWrite is an extensible AI writing platform for novels and long-form projects. It provides conversational writing, continuation, outlining, analysis and project-knowledge tools. Because it supports custom AI providers, it can connect to Flex AI (Flex247) through the OpenAI Compatible API.
Ownership and relationship notice
OpenWrite, its software, brand, interface and related intellectual property belong to the OpenWrite author. Flex247 and this site are not the developer or owner of OpenWrite. The site owner is simply one of its users and is sharing this guide after finding the app useful. This page does not imply an official partnership, authorization or endorsement by the OpenWrite author.
1. Download and install OpenWrite
Before configuring Flex AI, download and launch OpenWrite.
Download URL: http://openxz.cn/
On the download page, choose the version for your device:
- Windows: Download the Windows x64 ZIP archive, extract it and run the app.
- Android: Download the Android ARM64 APK package.
- macOS: Download the macOS DMG package.
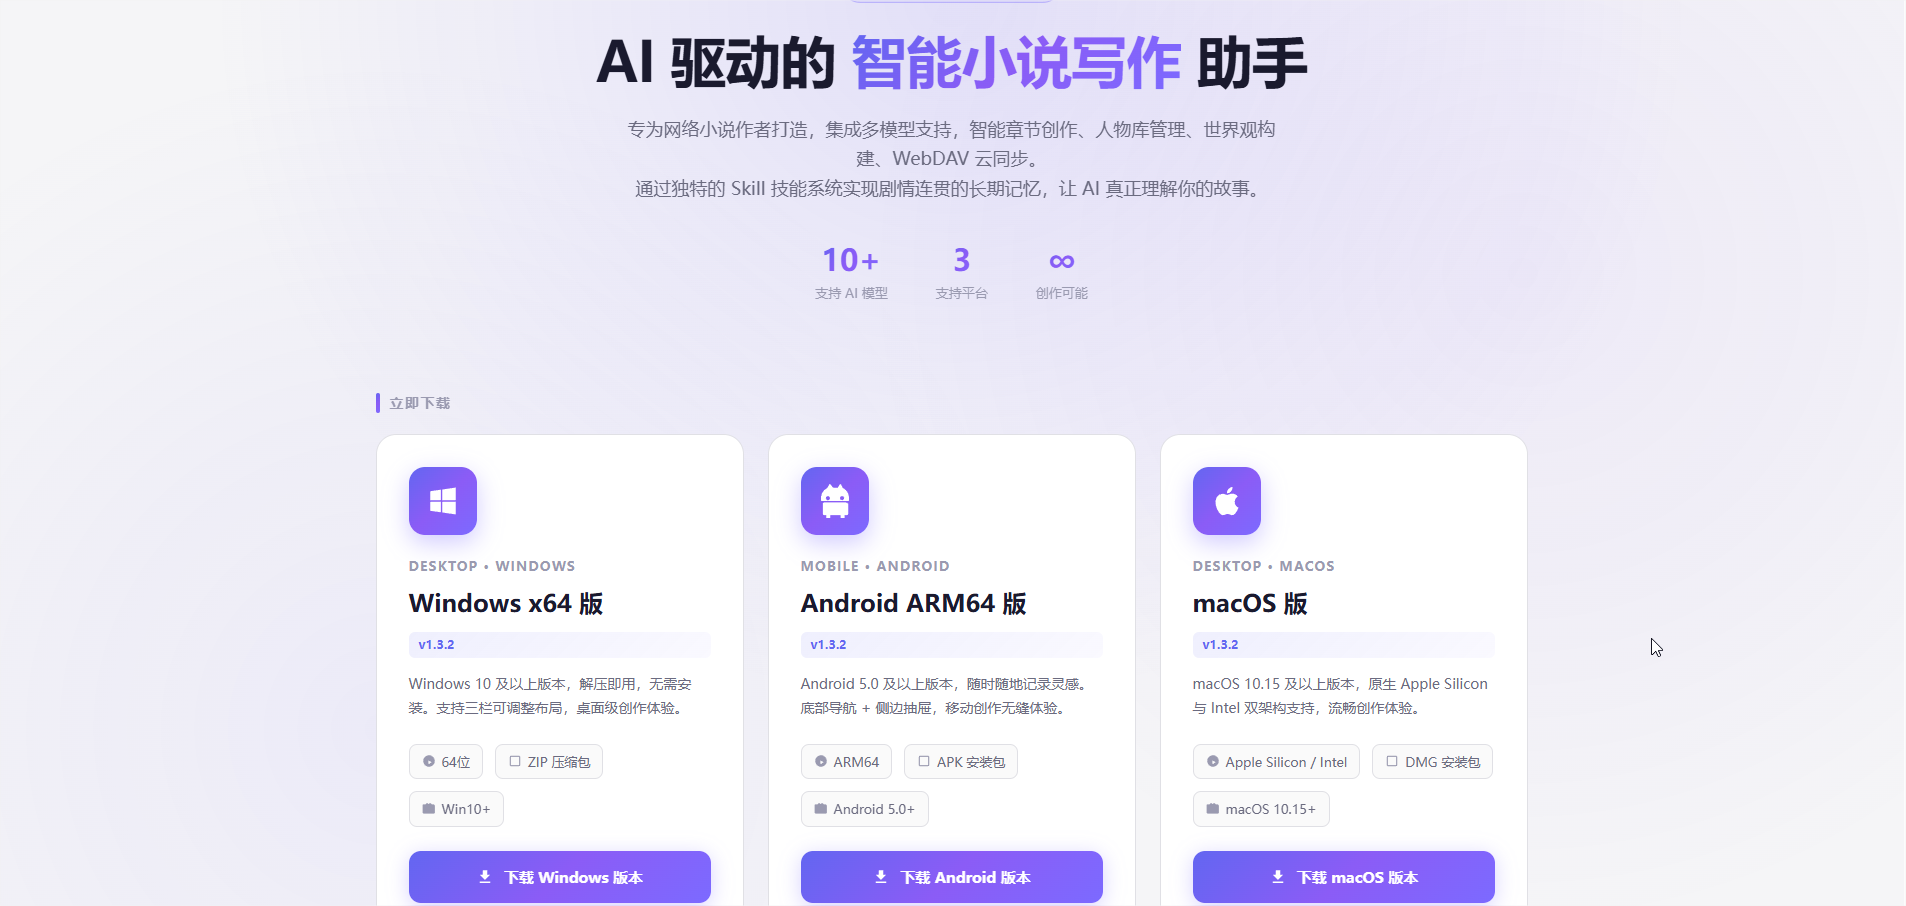
After downloading and launching OpenWrite, continue with the Flex AI configuration below.
Before you begin
- A working Flex247 account.
- A valid Flex AI API key. Create a separate key for OpenWrite, such as
OpenWrite-Windows. - An exact model ID from Model Square.
Keep your key private
An API key grants access to your account usage. Never expose a real key in chats, screenshots, documentation or public repositories. The key in this guide is masked.
2. Open Settings
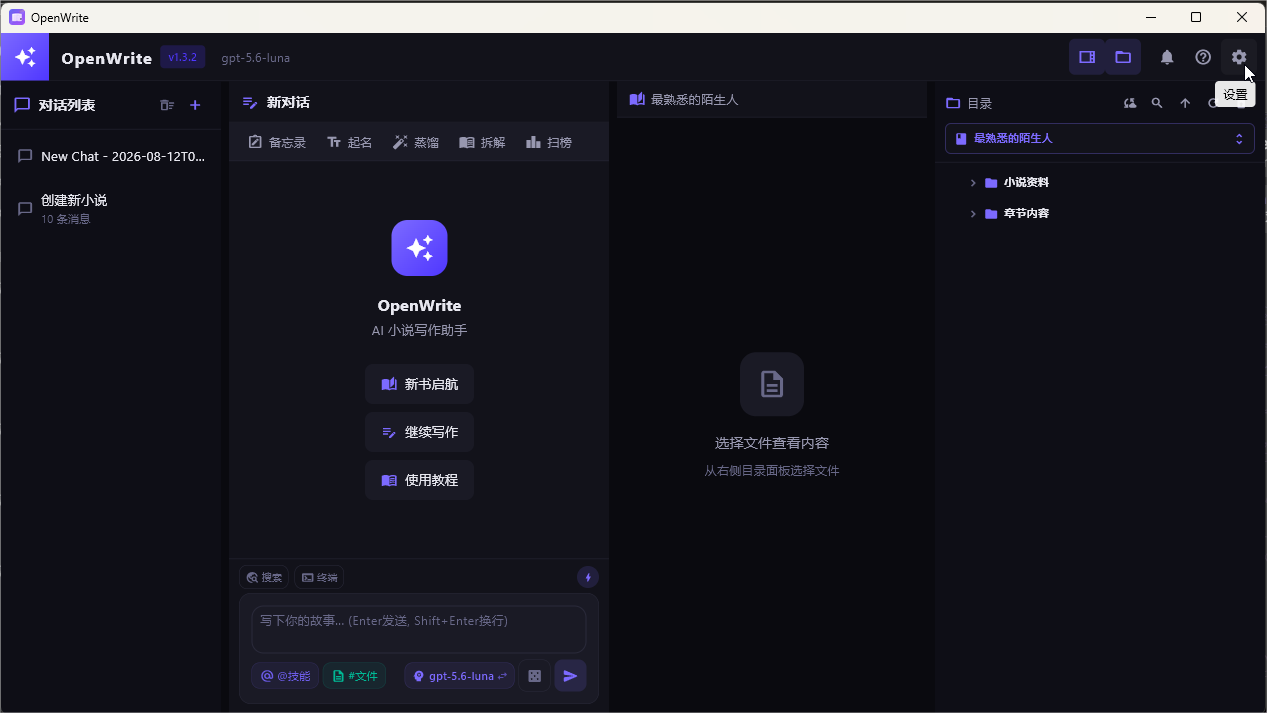
Start OpenWrite, then click the gear icon (Settings) in the upper-right corner.
3. Choose a custom provider
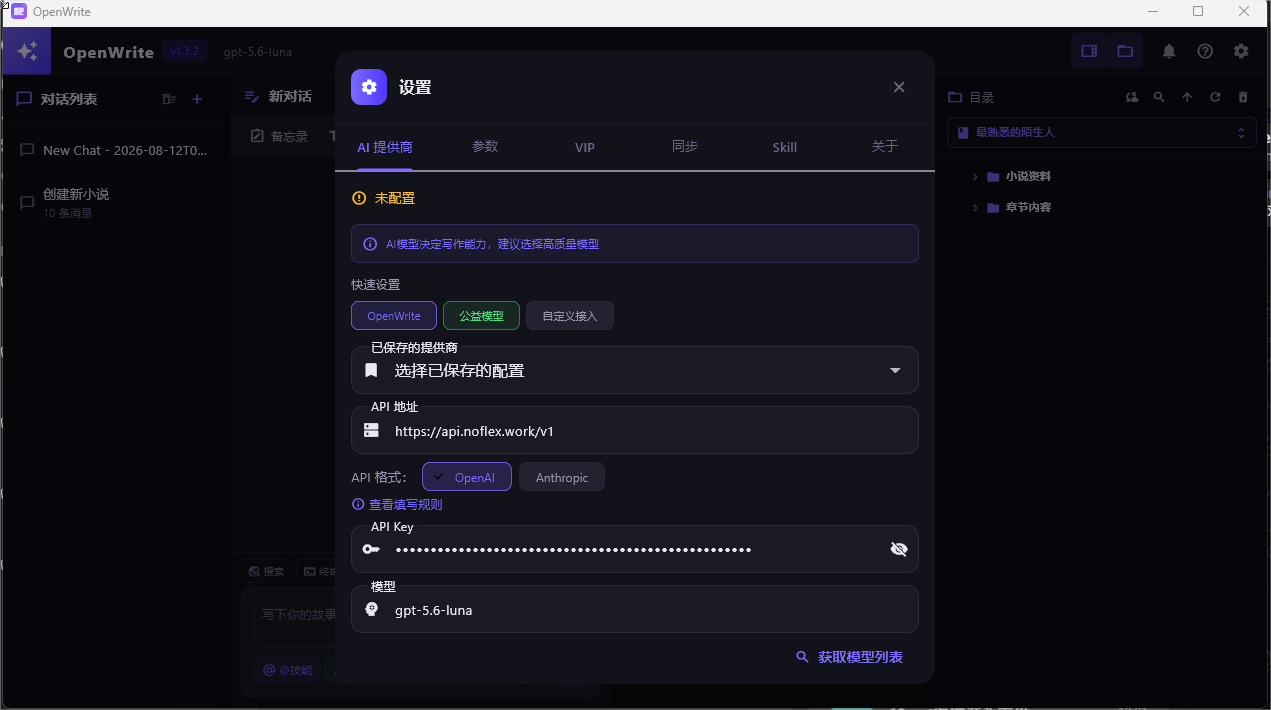
In the Settings window:
- Open the AI Provider tab.
- Select Custom Access under Quick Setup.
- Enter the Flex AI values below.
| OpenWrite field | Value |
|---|---|
| API URL | https://api.noflex.work/v1 |
| API format | OpenAI |
| API Key | The key created in your Flex247 console |
| Model | An exact model ID from Model Square, such as gpt-5.6-luna in the screenshot |
4. Load models and save
- After entering the API URL and key, click Get Model List.
- Select a model. If manual entry is supported, paste the exact model ID from Model Square.
- Click Save Configuration.
- Return to the main window and send a short test prompt.
Correct Base URL
OpenWrite requires /v1 for the OpenAI Compatible endpoint. Do not use https://api.noflex.work without /v1, and do not duplicate it as /v1/v1.
Recommended models
For OpenWrite, we recommend trying these models first:
- GPT 5.6 Luna
- DeepSeek V4 Flash
- GLM 5.2
- Qwen 3.8
- Kimi K3
A model's display name may differ slightly from its full backend model ID. Click Get Model List and select it directly whenever possible. For manual entry, use the exact model ID shown in Model Square.
Create a dedicated API key
- Sign in to Flex247.
- Open API Keys.
- Create a clearly named key, such as
OpenWrite-Windows. - Apply the required group, model restrictions and quota.
- Save the complete key immediately, then paste it into OpenWrite.
A dedicated key makes usage tracking, rotation and revocation easier without affecting your other applications.
Troubleshooting
The model list does not load
- Confirm the API URL is
https://api.noflex.work/v1. - Confirm OpenAI is selected as the API format.
- Check that the key is active, has available quota and can access the requested model group.
- Fully quit and reopen OpenWrite before trying again.
Content generation fails after saving
- The model ID must exactly match Model Square.
- Remove quotation marks or spaces around the model ID.
- Test with a known working text model first.
- Check the Flex247 usage logs for the exact error.
Screenshot version
The screenshots show OpenWrite v1.3.2 for Windows. Button positions and labels may change slightly in later releases, while the API URL, OpenAI format and key requirements remain the same.