Connect Cockpit Tools to Flex AI
Cockpit Tools is a third-party, local-first account manager for AI IDEs and Codex. It can manage custom Codex model providers and expose an authenticated local Codex API service.
Third-party project
Cockpit Tools is maintained by its open-source authors and community. Flex247 and this site do not develop or own it. Download only from the official repository and back up your existing Codex configuration before switching.
1. Install Cockpit Tools
Choose the package for your operating system from the official Releases page:
- Windows:
.msiorx64-setup.exe - macOS:
.dmg - Linux:
.deb,.rpmor.AppImage
Start Codex at least once so Cockpit Tools can discover its local configuration and instances.
2. Create a dedicated Flex247 key
Sign in to Flex247, open API Keys, and create a key dedicated to Cockpit Tools, such as Cockpit-Windows.
Protect the key
Never expose a real API key in screenshots, public documentation or chat messages. Revoke and replace any key that has been disclosed.
3. Open Model Providers
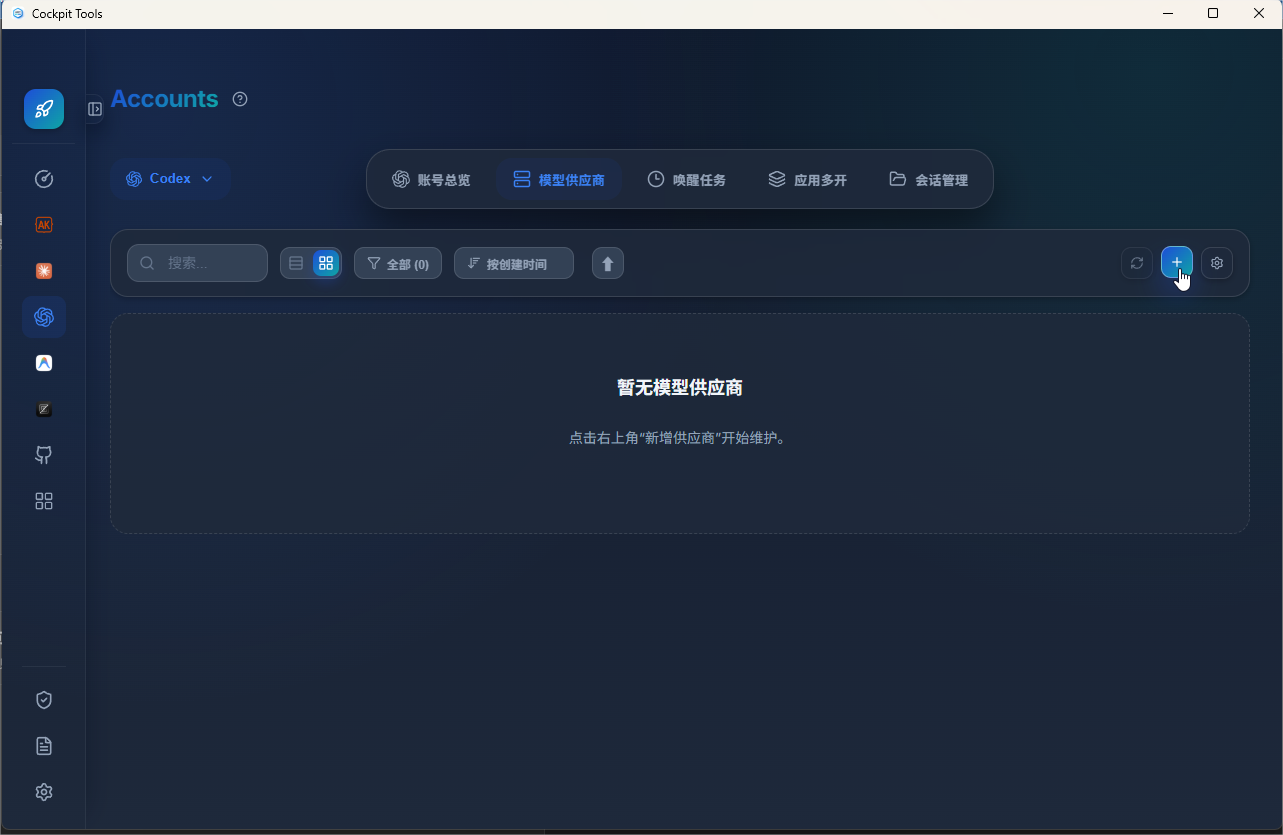
In Cockpit Tools, open Accounts → Codex → Model Providers, then click + in the upper-right corner.
4. Choose Custom
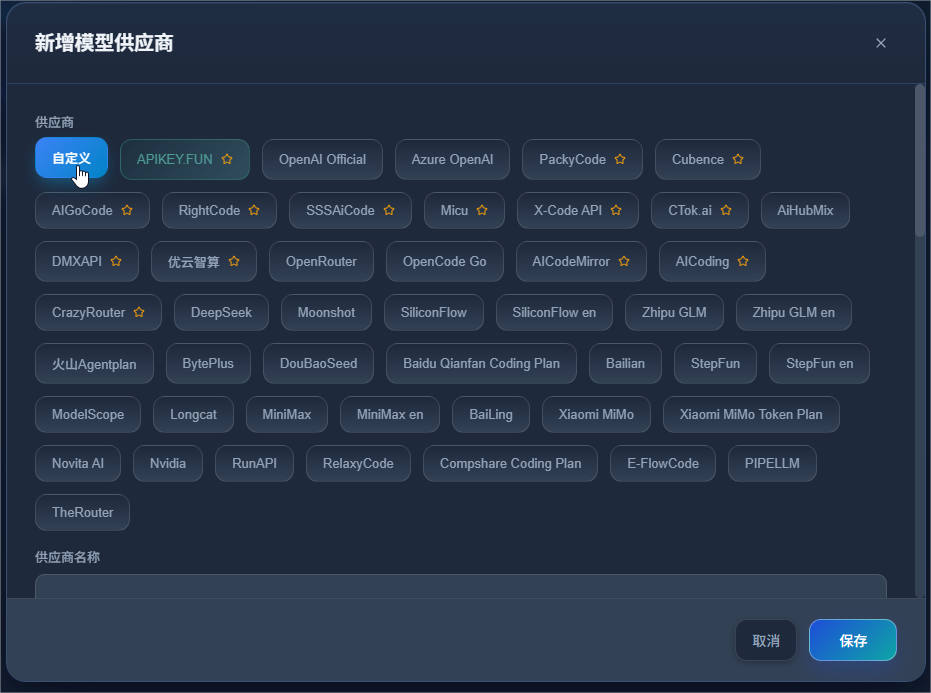
In the Add Model Provider dialog, choose Custom from the provider presets. Do not select a preset for an unrelated third-party service.
5. Enter the Flex247 provider
Enter the common fields first:
| Cockpit Tools field | Value |
|---|---|
| Provider Name | Flex247 |
| Base URL | https://api.noflex.work/v1 |
| Protocol | Responses Native |
| WebSocket Transport | Leave off by default; enable only after confirming that the upstream supports Responses WebSocket |
| Website (Optional) | https://noflex.work/ |
| API Key Page (Optional) | https://noflex.work/keys |
Use Responses Native for the normal setup. Set the Base URL only through /v1: do not append /responses or duplicate the suffix as /v1/v1.
Chat-Completions-only compatibility path
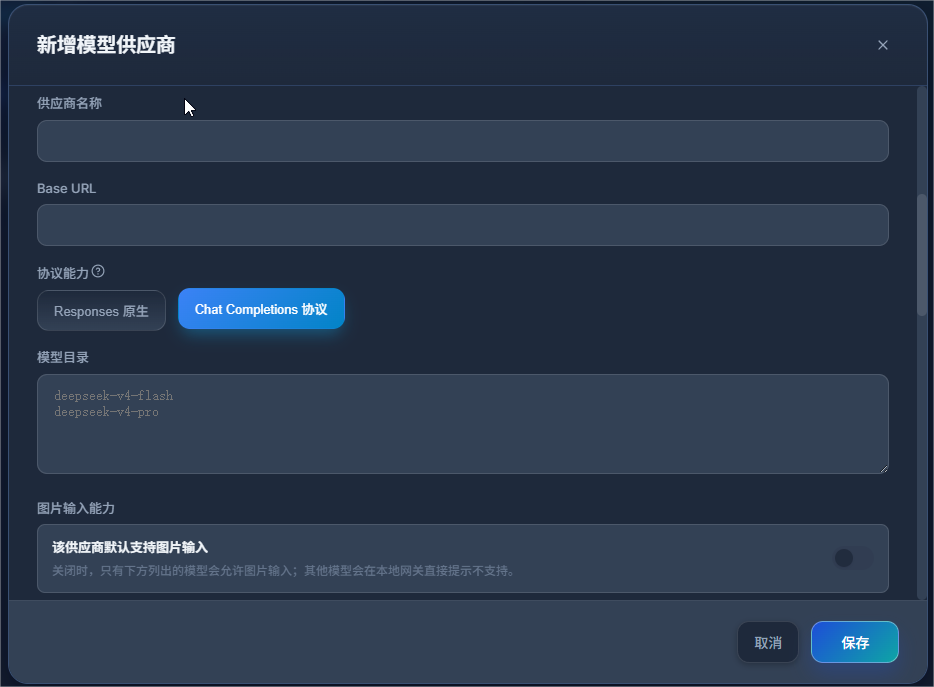
Select Chat Completions only when the target upstream explicitly lacks native /v1/responses support and you intentionally want Cockpit Tools to convert the protocol through its local gateway. Selecting it reveals the Model Catalog and image-routing fields.
| Chat Completions field | How to fill it |
|---|---|
| Model Catalog | Enter one exact model ID from Model Square per line |
| Image Input | Enable only when every model in the catalog accepts image input |
| Vision Models | If only some models accept images, leave the provider-wide toggle off and enter one vision model ID per line |
| Image Route Model | Optional; set only when image requests should fall back to a confirmed vision model, otherwise leave blank |
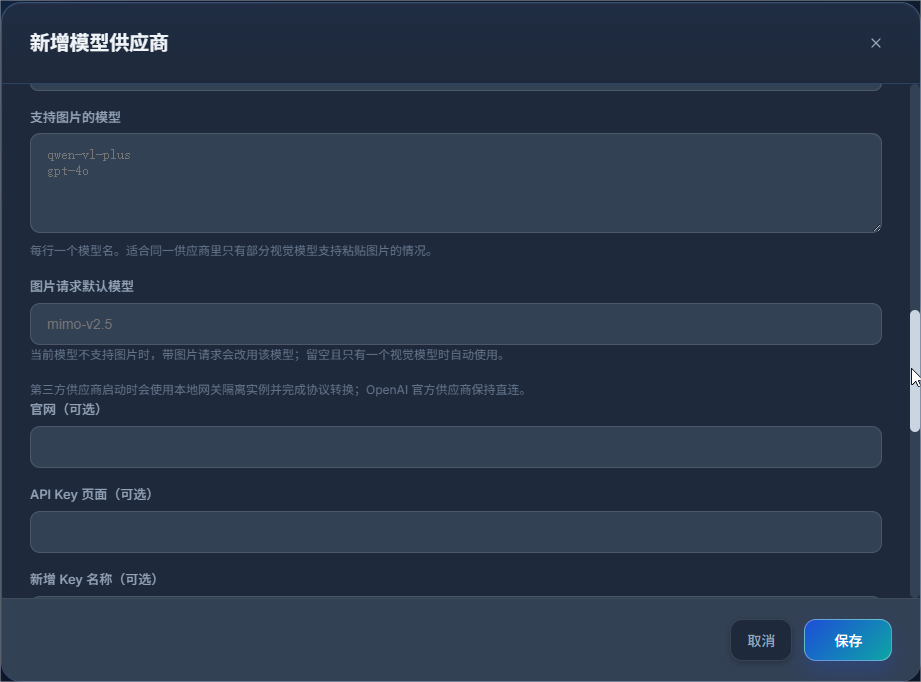
Do not copy the screenshot examples
deepseek-v4-flash, deepseek-v4-pro, qwen-vl-plus, gpt-4o and mimo-v2.5 in Figures 3 and 4 are Cockpit Tools interface examples, not model recommendations from this site. Use the current IDs and capabilities shown in Model Square.
6. Add the API key and save
Scroll down and enter:
| Cockpit Tools field | Value |
|---|---|
| New Key Name (Optional) | A recognizable label such as Cockpit-Windows |
| New API Key | The dedicated Flex247 key created in Step 2 |
A new provider requires at least one API key. Review Save Preview, then click Save.
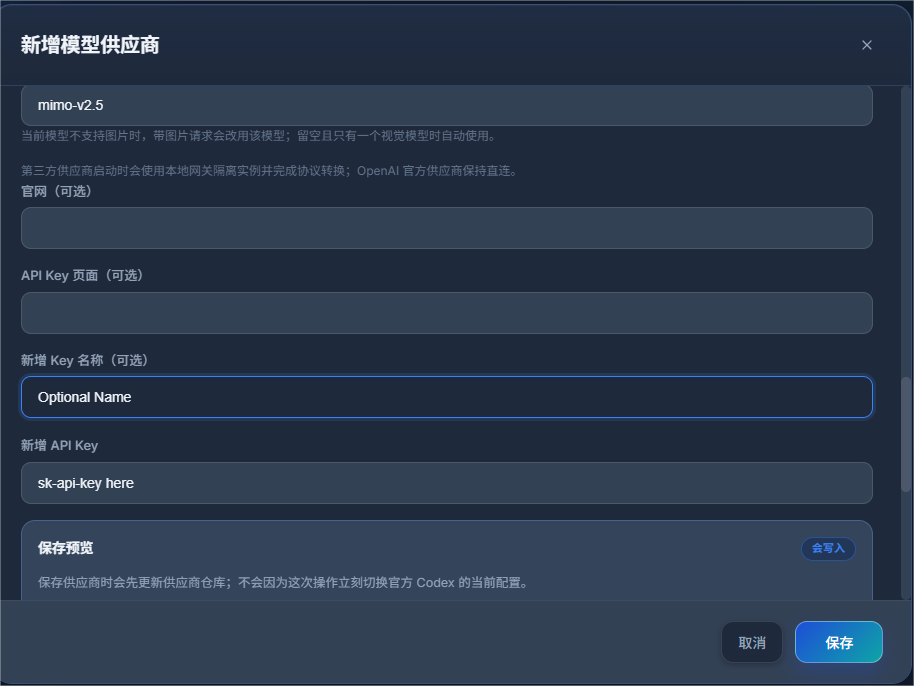
sk-api-key-here is a placeholder.Saving does not switch the active provider
Saving updates the Cockpit Tools provider store, but it does not immediately change the current Codex provider, Base URL or auth.json. The active Codex configuration changes only when the matching Codex API-key account is saved or switched, or when the provider is enabled and its instance is started.
7. Test, enable and start Codex
- Return to Model Providers. If the provider contains several keys, first select the key to use on its provider card.
- Click One-click Test, select Flex247 and run the chat test. If Cockpit Tools cannot determine a model automatically, enter an exact Model Square ID.
- Select the target Codex instance on the provider card.
- Click the play button, Enable and Start. If it is unavailable, open App Multi-Launch and start that instance once to initialize it.
- Send a short, read-only request in the newly launched Codex instance, then verify the successful request and expected model in Flex247 Usage Logs.
8. Optional: run the local Codex API service
Use Codex API Service when several accounts or providers should share one local endpoint:
- Keep the bind address on
127.0.0.1. Do not bind to0.0.0.0without proper network access controls. - Create a separate local client key.
- Add the Flex247 provider and API key to the service account or provider pool.
- Enable the service and use the Base URL shown in the UI, normally
http://127.0.0.1:<port>/v1.
The local client key authenticates clients to Cockpit Tools. The Flex247 key authenticates Cockpit Tools to the upstream API. Do not mix them up.
Troubleshooting
404 or Responses error
- Verify that the Base URL includes
/v1. - Select Responses Native.
- Do not append
/responsesto the Base URL.
Saving reports a missing API key
A new provider must contain at least one key. Return to the bottom of the form and paste the complete dedicated Flex247 key into New API Key.
Image input fails in Chat Completions mode
- Confirm in Model Square that the target model supports image input.
- If only some models accept images, turn off provider-wide image support and list the exact IDs under Vision Models, one per line.
- Set Image Route Model only when automatic fallback is required.
Codex still uses the old provider
Return to the provider card, select the correct Codex instance, then click Enable and Start. Saving the provider alone does not switch the active Codex configuration.
The local API service is unreachable
Check that the service is running, the port is free, and the client is using the local client key rather than the upstream Flex247 key.